Recently I’ve been busy setting up a new WD TV Live Streaming box. These media players by Western Digital are inexpensive little workhorses with a relatively pleasant user interface and are capable of playing a wide variety of video formats. Don’t get me wrong, the interface isn’t as pretty as an Apple TV’s, nor is it as responsive or as pleasant to use. It is however considerably better than the interface on most Smart TVs, and it plays far more video formats than the Apple TV does. It also has other abilities, including streaming over the network from a computer or an NAS.
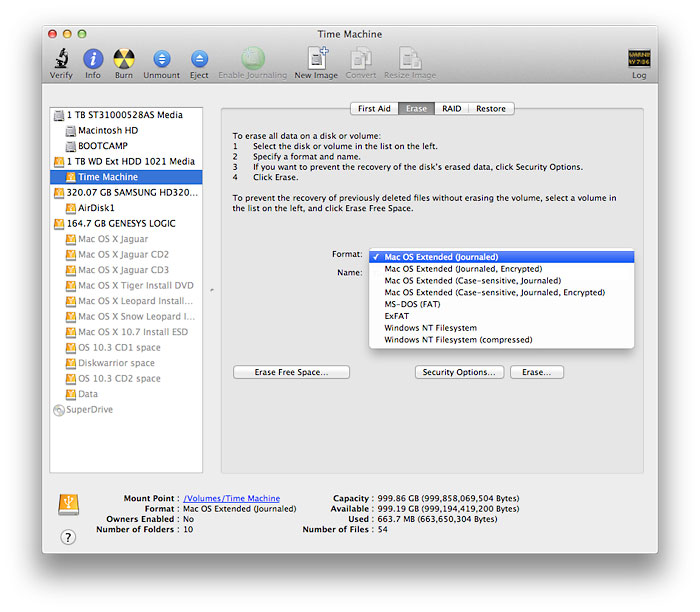
All I wanted to do with mine was to directly connect a USB hard drive. The drive formats supported by the WD TV are FAT32, NTFS, and HFS+ (non-journalled). FAT32 has a 4 gigabyte file size limit which makes it impractical for many HD movies, and NTFS is not natively supported by the Mac. (I have had mixed experiences with Paragon NTFS – including one instance of drive corruption – which makes me unwilling to use it again). I therefore wanted to format the hard drive as HFS+ non-journalled. Imagine my surprise when I fired up Mountain Lion’s Disk Utility app only to find that the ability to format as HFS+ non-journalled has been removed!

In OS X 10.8 Mountain Lion the HFS+ non-journalled option has been removed from Disk Utility
Command line to the rescue
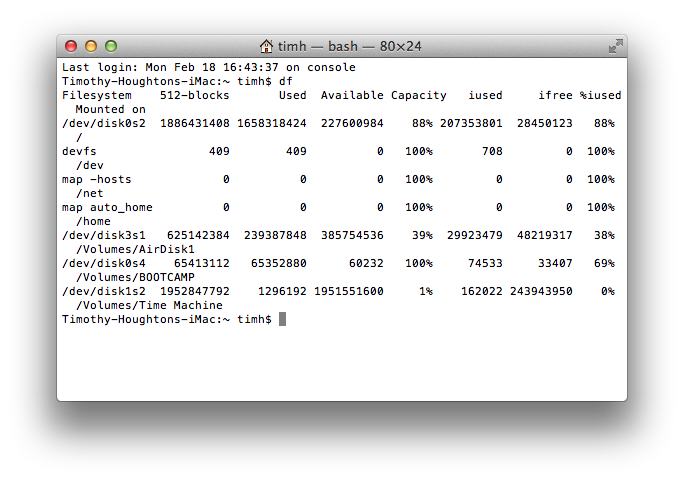
To start with we open Terminal.app and type in the command df:

Results of ‘df’ command in Terminal.app
This gives us a filesystem address for our external drive (named Time Machine) of /dev/disk1s2
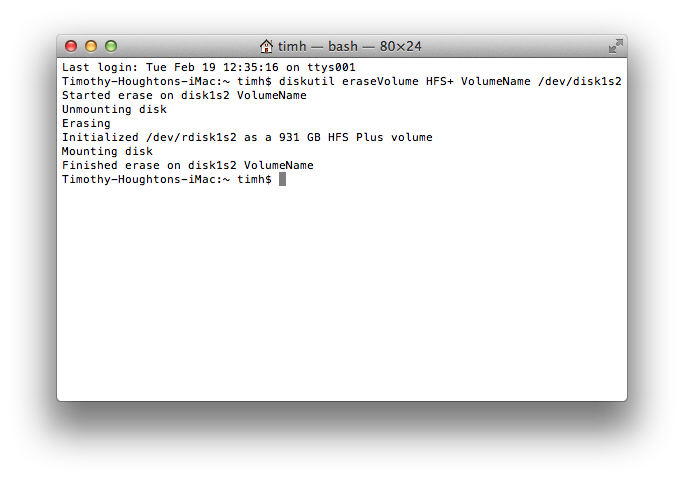
We can then insert this address into this Terminal command:[/vc_column_text]

Format complete
Note that this will result in a formatted disk with the name of ‘VolumeName’. Substitute your desired volume name in the command above, or simply rename it upon completion.
Thanks so much, exactly what I was bring to do after WD Live TV stopped reading my NTFS formatted drive and then wouldn’t read a FAT32 drive